I promise I’ll post some portraits soon! I am enjoying my isolation by creating daily. Something I don’t usually have the time to do, so in that way, this time has been a gift.
I learned to rust print at a workshop I took last year in Eastbourne, England with Alice Fox. It is everything I love in printing. Unpredictable, messy, easy, and the results are just gorgeous. I pick up every rusty bit of metal I find during my beach clean-ups. I then use them to print with. I include the papers and materials in my art journals, and creations. I’d stumbled across Alice a few years ago on Pinterest, and thought to myself how much I wanted to meet her. It took a couple of years, but eventually everything aligned and I was able to take a course with her. I hope I get to do another one of these days, it was a magical experience studying with her.
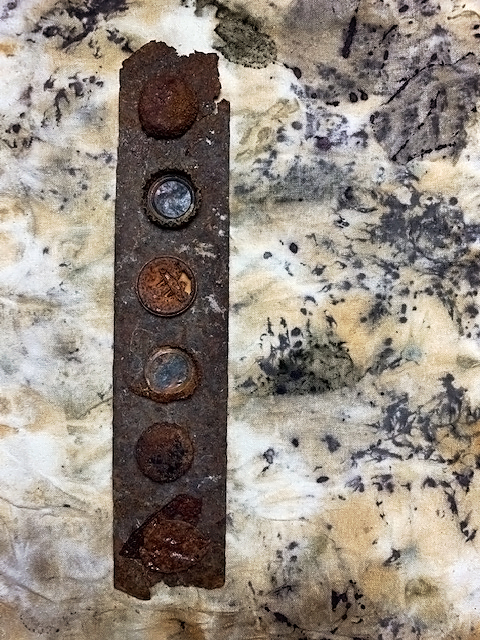
After my prints were dry today, I lined up the bottle caps (and a pin which I didn’t realize was a pin until I’d grabbed it to print with, so it was a bonus surprise!) on a long bit of metal whilst cleaning it all up. I loved the way they looked and decided to post an image of them like that. The background is some eco printed fabric I’d made a couple of weeks back from a bouquet of flowers I’d been sent. (I waited until the flowers were ready for my compost bin before I used them, lest I sound like a cold soul, haha. They were well enjoyed, and then they were used to create with. A total win-win).
Rust Printing.
Supplies: a tray, watercolour paper, cotton/silk, rusty objects, brewed green or black tea, a 1 or 2″ paintbrush.
To create a rust print, use quite strong green or black tea to coat your paper or material using a paintbrush. I usually go over the substrate a couple of times in opposite directions. I am not careful about going all the way to the edges, or making it perfect, I prefer the imperfections. Lay the rusty objects on the paper/material. Dip your brush in the tea, and go around the edges of each object with a good amount of extra tea. (see why you need a tray?) If the metal is oddly shaped, sometimes I put a weight on top of it, but mostly, I just let them do whatever they’re going to… Leave it all to dry. Try not to move or shake the objects, you’ll get the best prints if the rust is allowed to ‘bleed’ into the tea and settle into your paper.
I usually leave it all overnight before I remove the rusty objects. The objects can be used more than once, just fyi.
Green and black teas will give slightly different colours, as will the type of paper. Where you find the objects also makes a colour shift, objects rusted by the sea have a more orangey tint.
.jpg) And never one to waste a good container of tea, I always add a few tags in to the mix before I’m done. A lot of years ago now, I was at a tag sale, and they had a large box filled with tags. Mostly like the ones in the photo, but a few others thrown in for good measure. There must have been a couple of hundred tags in the box, at least. $2. I took that sucker home with me, and have been creating tags for many years with them. I just adored how this batch came out. Way better than the paper I’d set it all up for. (Which you can probably tell because I didn’t even post a photo of it! I didn’t use watercolour paper this time, and that wasn’t my best move). Can’t wait to use these tags in my art.
And never one to waste a good container of tea, I always add a few tags in to the mix before I’m done. A lot of years ago now, I was at a tag sale, and they had a large box filled with tags. Mostly like the ones in the photo, but a few others thrown in for good measure. There must have been a couple of hundred tags in the box, at least. $2. I took that sucker home with me, and have been creating tags for many years with them. I just adored how this batch came out. Way better than the paper I’d set it all up for. (Which you can probably tell because I didn’t even post a photo of it! I didn’t use watercolour paper this time, and that wasn’t my best move). Can’t wait to use these tags in my art.
Have you been creating anything during this isolation time? I’d love to hear all about it.


